Why You Should Turn Off Your Outdoor Water Spigot in Winter
Winter weather brings freezing temperatures that can wreak havoc on your home’s plumbing if proper precautions aren’t taken. One of the simplest yet most crucial tasks you can do to protect your property is turning off your outdoor water spigot. Failing to do so can result in costly and damaging problems.
Here’s why shutting off your outdoor spigot is essential and how to do it correctly.
The Risks of Leaving Your Outdoor Spigot On
1. Frozen Pipes
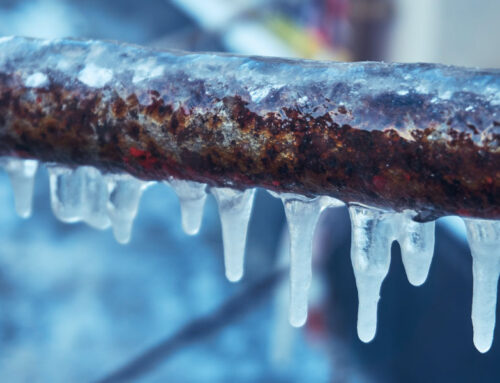
When water is left in the outdoor spigot and connected pipes during freezing weather, it can freeze and expand. This often leads to burst pipes, causing water leaks and potential flooding in your home.
Outdoor spigots are typically connected to pipes that run through exterior walls, which are more exposed to cold temperatures and prone to freezing.
2. Water Damage
A burst pipe from a frozen spigot can release hundreds of gallons of water, leading to extensive water damage in your home. Water damage can compromise walls, ceilings, and flooring, and may result in long-term issues like mold growth if not addressed promptly.
3. Increased Repair Costs
Replacing a burst pipe or repairing water damage is far more expensive than the simple precaution of shutting off your spigot. Ignoring this small task could cost you thousands in emergency plumbing services and home restoration.
How to Properly Shut Off Your Outdoor Spigot
Step 1: Locate the Shut-Off Valve
Most outdoor spigots have a dedicated shut-off valve inside your home, typically located in the basement, crawlspace, or utility area near the exterior wall.
Step 2: Turn Off the Water Supply
Close the shut-off valve completely to stop water flow to the outdoor spigot.
Step 3: Drain the Spigot
After turning off the valve, open the spigot outside to drain any remaining water in the pipe. This prevents water from freezing and causing damage.
Step 4: Disconnect Hoses
Remove any hoses or attachments from the spigot. Leaving them attached can trap water, increasing the risk of freezing.
Step 5: Insulate the Spigot (Optional)
For added protection, cover the spigot with an insulated cover or foam faucet protector to shield it from freezing temperatures.
Additional Tips for Winterizing Your Plumbing
- Inspect Pipes: Check for any exposed pipes and insulate them to prevent freezing.
- Monitor Weather: Be proactive and winterize your spigot before temperatures drop below freezing.
- Consider Frost-Free Spigots: Upgrade to frost-free spigots, which are designed to prevent freezing by keeping the valve inside your home.
What to Do If You Experience Damage
If you notice a burst pipe or water damage despite precautions, don’t wait to address the issue. At RDC Restoration, we specialize in water damage restoration, mold remediation, and emergency services to protect your home and restore it to its original condition.
Conclusion
Turning off your outdoor water spigot during the winter is a small step that can prevent big problems. By taking a few minutes to shut off and drain your spigot, you can save yourself from the stress, expense, and inconvenience of frozen pipes and water damage.
If winter weather causes damage to your home, trust RDC Restoration to provide fast and reliable solutions. Contact us today to learn how we can help you protect your property this season!


